
How to compress a Video using VLC
- Jun 15, 2018
- 2 min read
A friend asked me what the best options were for compressing a video. The max file size was 50MB and the original video was 250MB. The first go around I just used Corel Video Studio and compressed it that way. However, rather than compress a video for her every time she needed it I decided to follow the ancient adage, "Compress a video for a woman, feed her for a day. Teach a woman to compress a video, feed her for life" ... or something like that.
VLC has been a tool in my computer software tool box for years. Being able to play all sorts of video types, compress, capture and stream, it is definitely a Swiss Army knife of video software.
Download the latest version of VLC from here:
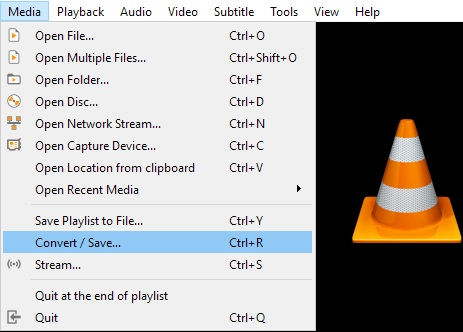
1 - Select Video For Compression
Launch VLC and select Convert/Save... from the Media file menu bar.
This will launch the Open Media window. Click the Add button and chose the file for compression
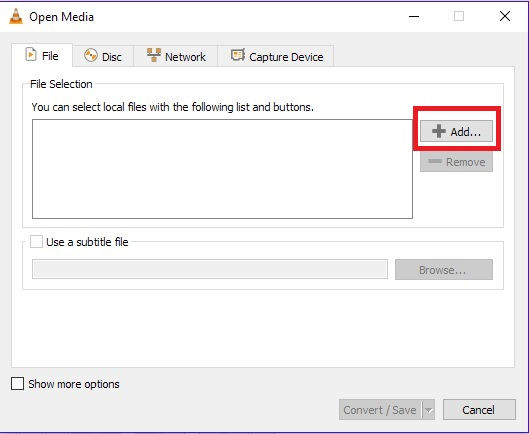
Select the file from the list box, and click the Convert/Save button

2 - Profile Selection
The Convert window will appear. Now from the Profile Selection combo box, I selected the Video for Youtube HD setting. This had a good base to work with.

Click on the crescent wrench button (Edit) to edit the settings for the profile.

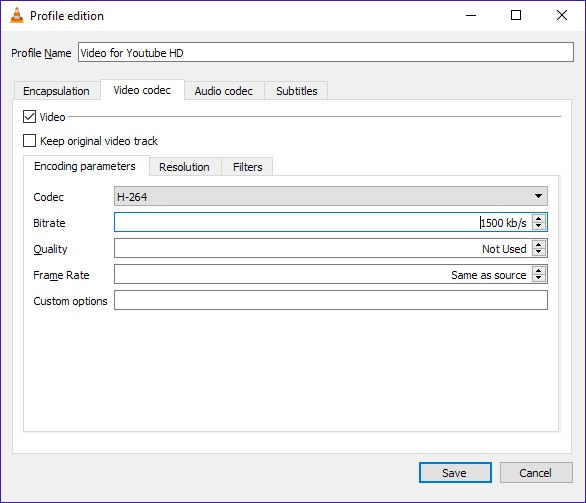
3 - Compression Settings
I only changed a couple settings. This was to make sure that the video met the 50MB requirement.
These are the default Encapsulation settings. These do not need modified.

On the Video Codec tab, the first sub tab (Encoding Parameters) I modified the Bitrate to 1500kb/s. This should be enough to maintain the quality for low action, not super detailed videos. If the quality isn't good enough at this resolution. This number can be increased. I probably wouldn't go much further down than this
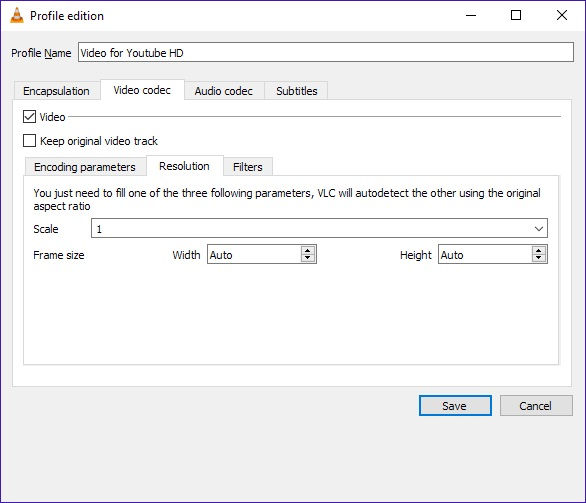
On the Resolution tab, I'd like to keep the original video's size (although this is another parameter that could be tweaked if needed to compress the video further. Changing the video from 1080 to 720 would make the video file even smaller) So what I did was make sure the Scale is 1 (so that it doesn't scale), and for good measure I changed the Frame size to Auto. To do this, make it 0px (It doesn't allow you to type auto, but when you type 0 it will change to Auto)
I decided to Keep the Original Audio track, because I like to keep things at decent sound quality. So check the Keep Original Audio Track option
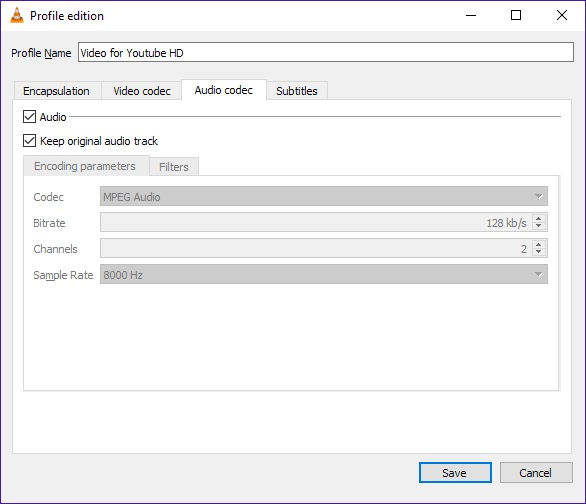
After all the settings are correct, click the Save button
3 - Begin Compression
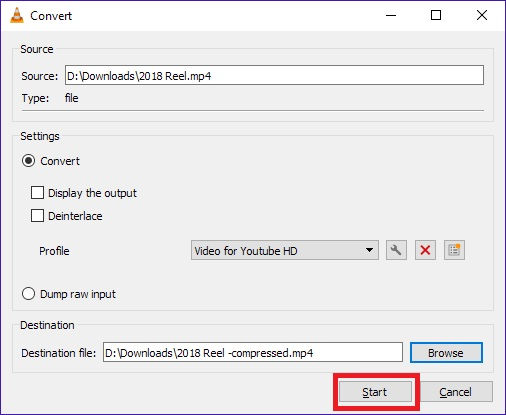
Now click Browse and choose a new file name for the compressed file and click Start to begin the compression process!
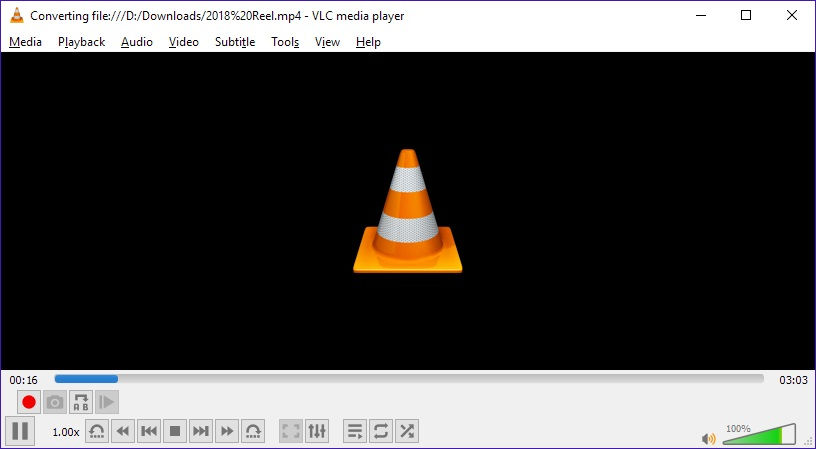
The compression process takes you back to the normal VLC window, and you can watch the track bar go from 0 to the video time length. Once it reaches the end, the compression is compression.
4 - Results
Here is the file size difference shaved off over 200MB!

Here is a screen cap side by side of the video. Original on the Left, Compressed on the Right.

You can barely see a difference!
That's all there is to it.


Comments